
Key Takeaways
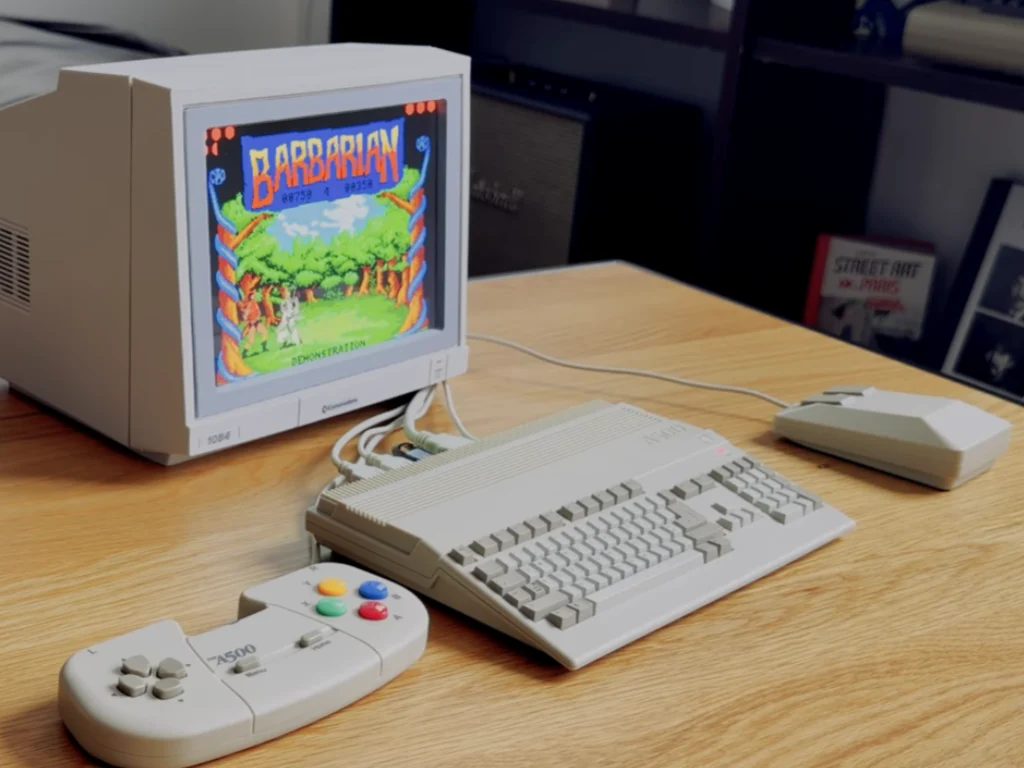
1. The YouTube channel “Press Any Key to Continue” showcases a mini version of the Commodore 1084 monitor designed for mini retro consoles like the Amiga A500 Mini and Commodore 64 Mini.
2. The YouTuber used 3D printing techniques to create the monitor’s enclosure, incorporating modern tech upgrades for improved user experience.
3. The build features an 8-inch budget-friendly LCD screen with HDMI input, analog connections, a built-in speaker, and remote control.
4. The design process utilized Fusion 360 and a Bambu Lab A1 printer, resulting in a simplified enclosure decorated with Commodore branding.
5. While STL files for the specific 3D prints weren’t provided, viewers can find similar designs on platforms like Thingiverse.
Retro lovers are always looking for fresh ways to bring back the memories of old-school systems. A recent example of this is the YouTube channel “Press Any Key to Continue,” which featured a mini version of the Commodore 1084 monitor. This scaled-down model is designed to pair well with the Amiga A500 Mini and the Commodore 64 Mini.
Creation Process
The YouTuber crafted the whole project using 3D printing techniques to create a smaller version of the classic 1980s monitor design. Along with this, he added some modern tech upgrades to enhance the user experience.
The inspiration for this project came from the YouTuber’s wish to create something that matched today’s mini retro consoles. In the past, Commodore made several monitors during its peak time. Nevertheless, the modder focused on the 1081 and 1084 models because they were standout pieces from the C64 and Amiga time periods.
Technical Details
In his YouTube video, the modder detailed the entire construction process. The main component of the build is a budget-friendly 8-inch LCD screen sourced from a camera monitor. This screen typically retails for about $70 on Amazon and features basic HDMI input, analog connections, a built-in speaker, and even a remote control.
He took apart the camera monitor and reused the remote by fitting it into the bezel of the mini monitor. However, he experimented with different LCD options before making his final decision.
Design and Assembly
Using Fusion 360 and a Bambu Lab A1 printer, the YouTuber designed and 3D-printed a simplified enclosure, which includes a gray frame, a sliding chassis, a rear cover with mounts for the speaker, and a connector cover.
After removing the support pieces from the chassis, the individual parts fit together perfectly. The original mounting brackets of the LCD were utilized, and he completed the project by decorating the housing with stickers that showcase the Commodore logo and model numbers.
Although the modified monitor lacks the classic cathode-ray glow of older CRTs, the YouTuber expressed satisfaction with the clear 8-inch LCD and the small yet effective speakers.
Final Touches
While he didn’t provide the exact STL files for the 3D prints, he guided viewers through the entire creative journey, covering everything from modeling techniques and printing configurations to assembly steps. You can still find ready-to-download 3D-printing files for mini Commodore monitors, like the Commodore 1701 Mini Monitor for the C64 Mini, available on platforms like Thingiverse.
Source:
Link
Leave a Reply