
Key Takeaways
1. Basic Components: A functioning laser microphone can be made using three main parts: a laser, a photodiode, and an amplifier circuit. An optional fourth component can enhance its capability.
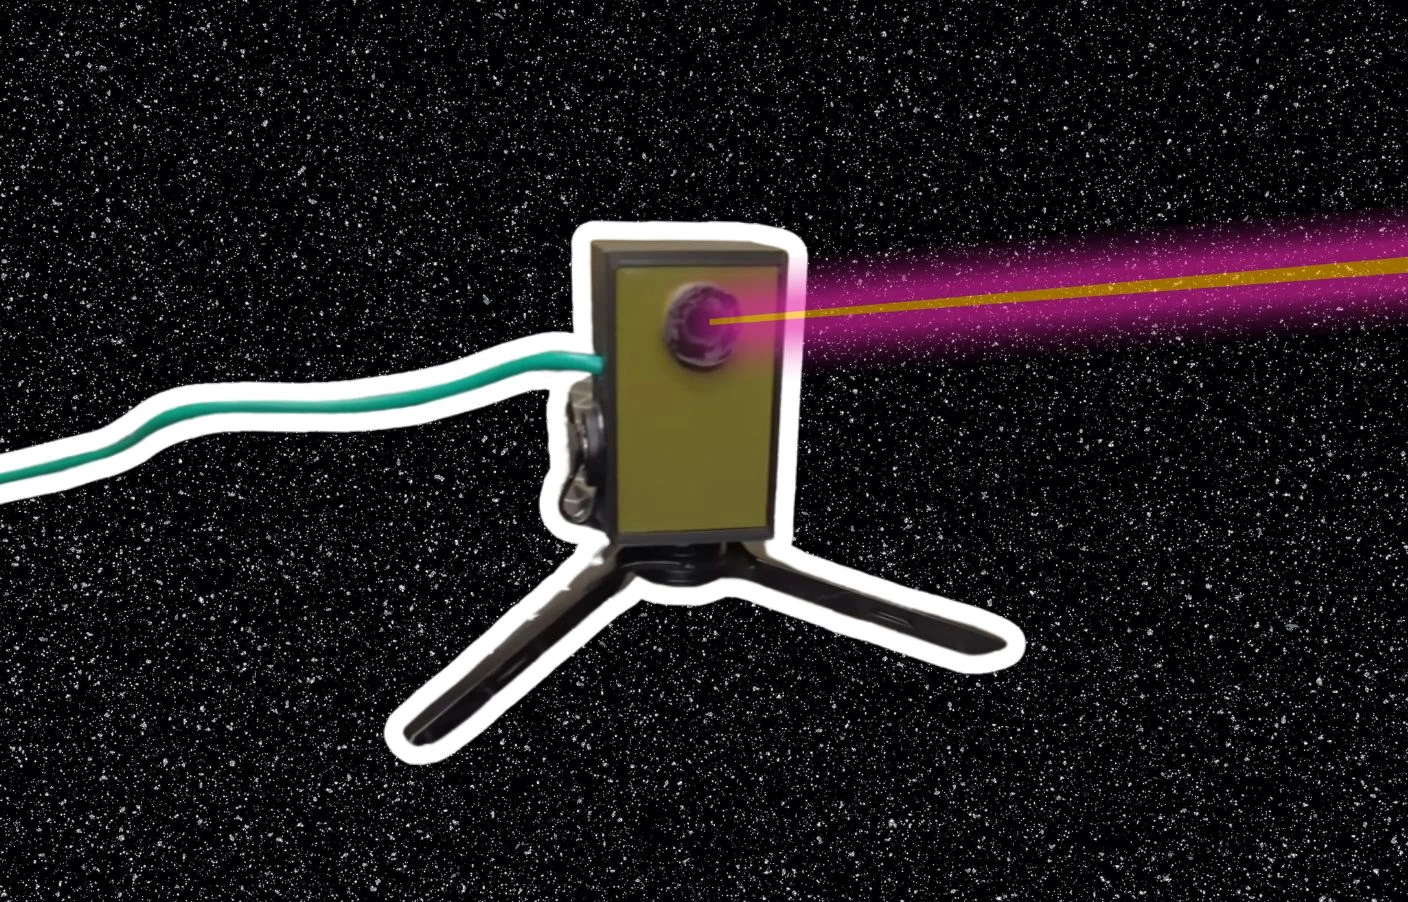
2. Working Principle: The laser microphone captures sound by directing a laser beam onto a glass surface. Vibrations from sounds modulate the laser reflection, which the photodiode detects and converts back into audio.
3. Easy Sourcing: Photodiodes can be easily sourced from devices like televisions or smoke detectors, while the amplifier circuit can be modified from existing electronics.
4. Setup and Configuration: Proper setup involves replacing a built-in mic with a photodiode, modifying a USB cable for power, and positioning the laser beam correctly to ensure effective audio capture.
5. Performance Limitations: The system can be affected by environmental vibrations and obstacles. Improvements, such as using a 3D-printed case and adding a filter, can enhance performance.
With so many electrical parts available today, it’s no wonder that anyone can create a functioning laser microphone from common items. You can find the necessary components at online stores, or even scavenge from e-waste lying around your home. By using three main parts, and optionally a fourth, anyone can eavesdrop on sounds from afar with a homemade laser mic. The process is quite simple, provided the user has a device capable of recording mono audio.
How Laser Microphones Work
According to SomethingAboutScience, the way a laser microphone operates is by directing a laser beam onto a window or picture frame inside a room. The beam’s reflection is captured by a photodiode. Any sounds produced within the room create vibrations in the glass, which in turn modulates the laser reflection. The photodiode is then able to detect these changes and convert them back into audio. Interestingly, SomethingAboutScience mentions that you don’t necessarily need a red laser; an infrared laser can be a stealthy alternative.
Sourcing Components
Finding a photodiode is quite easy since it’s commonly found as an infrared receiver in televisions and certain smoke detectors. However, the diode cannot work by itself because the signal from the laser is too weak. This is where an amplifier circuit becomes useful; it amplifies the signal, provides necessary power, and transmits mono sound. In this instance, a modified amplifier circuit similar to the MAX9814 was utilized. To create the laser microphone, the built-in mic is taken out and swapped for the photodiode. A USB cable is then modified and soldered to the circuit board for power, and a mono audio wire with a jack is attached for audio output. Once everything is set up, it’s just a matter of positioning the laser so the beam strikes the photodiode at a perfect angle to capture the sound modulations effectively.
Limitations of the Setup
Though this assembly is straightforward, it comes with some drawbacks in terms of performance. For one, both the laser and the photodiode can be affected by vibrations in the environment, and any objects between them can interrupt the audio transmission. To help improve this somewhat, SomethingAboutScience created a 3D-printed case and added a filter to the receiver, leading to slightly better results. In summary, this project is open to further improvements and highlights how a bit of DIY creativity can yield great results. Those curious can explore more about the construction and outcomes via the links provided below.
Leave a Reply