Tag: 3D printing

  • AI Model Accurately Identifies Sources of 3D-Printed Parts

    AI Model Accurately Identifies Sources of 3D-Printed Parts

    Key Takeaways

    1. Each industrial 3-D printer produces a unique surface pattern specific to that machine.
    2. A convolutional network can accurately identify the printer that produced a part with 98.5% accuracy.
    3. The model can determine manufacturing process and material with up to 100% accuracy.
    4. Image resolution and crop size influence model accuracy; smaller crops are sufficient for some techniques, while others require larger areas.
    5. This method can enhance supply chain monitoring by verifying machine use and detecting unreported process changes.


    Researchers at the University of Illinois have discovered that every industrial 3-D printer creates a unique surface pattern that is specific to that machine. By using a convolutional network trained on these patterns, they can accurately identify which printer produced a part.

    Research Overview

    The research team created 9,192 parts using 21 different commercial machines that utilized four types of additive-manufacturing processes: digital light synthesis, multi-jet fusion, stereolithography, and fused-deposition modeling. Each part was scanned at a resolution of 5.3 µm per pixel on a flatbed document scanner, resulting in a comprehensive high-resolution image library for both training and testing the model.

    Model Performance

    Employing an EfficientNet-V2 architecture along with a voting mechanism based on various random image crops, the model achieved an impressive 98.5 percent accuracy in identifying the source printer for previously unseen parts. Additionally, it could determine the manufacturing process and material with up to 100 percent accuracy, and even estimate the position of build trays for digital-light-synthesis parts within about 5 cm (~1.97 in).

    Implications for Industry

    The study explored how the accuracy of the model is influenced by image resolution and crop size. For techniques like digital light synthesis, a crop size of 200 µm was sufficient, while for fused-deposition parts, larger areas (around 3 mm) were necessary, although these could work with lower resolutions. This makes the method suitable for standard cameras and scanners.

    Apart from basic classification, this method serves as a valuable tool for monitoring supply chains. It can verify whether a contractor used the correct machine, detect unreported changes in processes, and assist in tracing defective or counterfeit parts even without embedded labels or the need for supplier cooperation.

    Source:
    Link

  • Philips Launches Fixables: 3D Printed Replacement Parts Available

    Philips Launches Fixables: 3D Printed Replacement Parts Available

    Key Takeaways

    1. Philips launched ‘Fixables’, a platform for 3D printable components to reduce waste from broken or missing parts of personal health items.
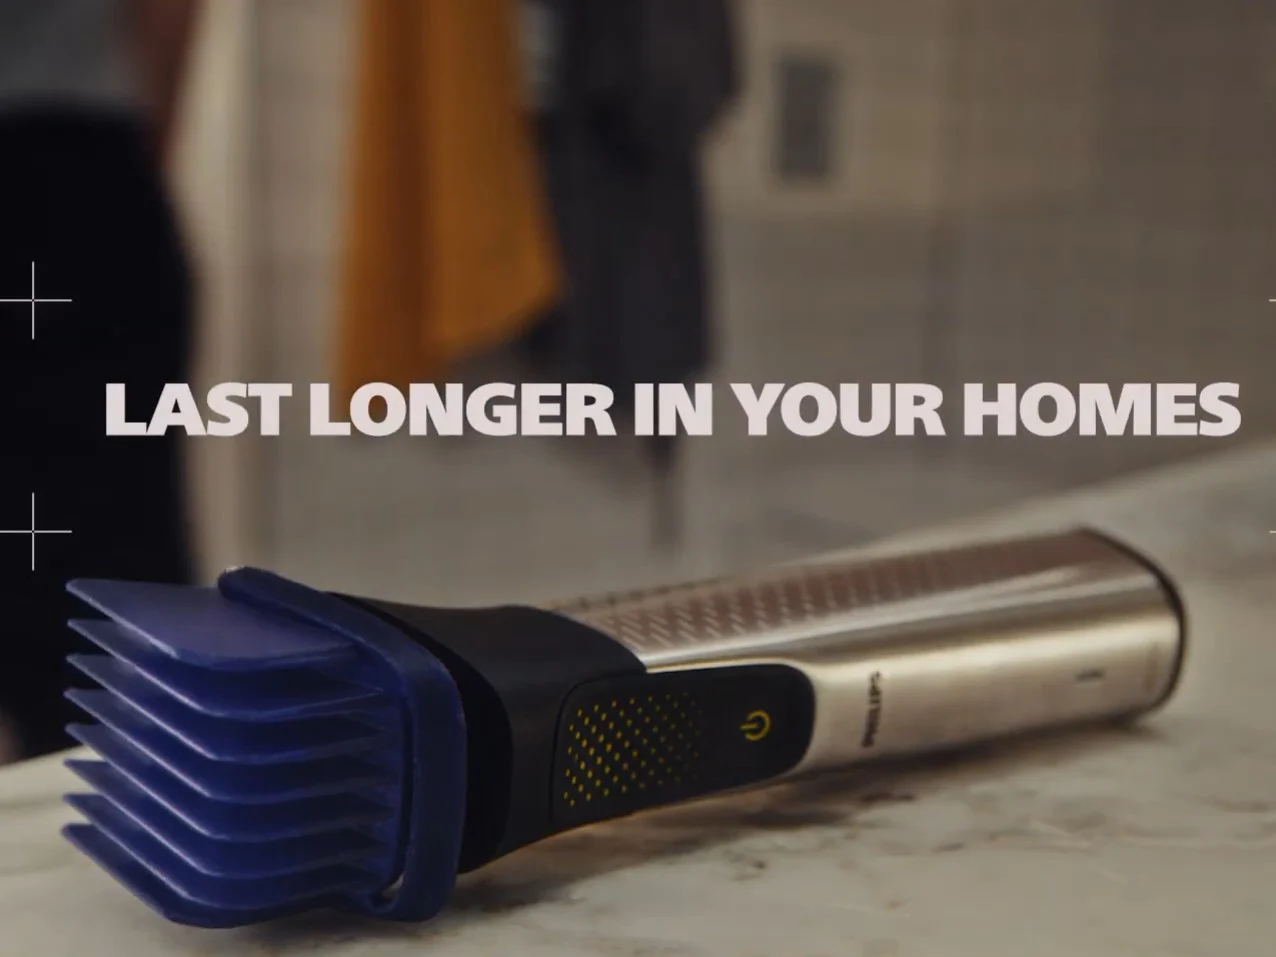
    2. Currently, the platform offers a 1-3mm comb for the Philips OneBlade, with plans for additional parts in the future.
    3. Users can request new parts, but the 3D printed components will not replace original parts.
    4. The initiative first launched in the Czech Republic, in collaboration with Pura Research, and may expand to other countries based on its success.
    5. Philips encourages contributions from repair professionals and 3D printing enthusiasts to enhance the project.


    In an effort to keep its products out of landfills caused by a broken piece or missing accessory, Philips has unveiled ‘Fixables’, a platform that allows owners of its personal health items to download printable files for any broken or missing components and then use a 3D printer to create them.

    A New Resource for Customers

    The goal of Fixables is to create a library of 3D printable components for Philips products. As of now, the Fixables site offers just one part, which is a 1-3mm comb designed for the Philips OneBlade. The page for each part includes essential details like the estimated print time, the material suggested—which is PLA for this part—and the layer height. Additionally, it displays outlines of two future parts: a 7-24mm comb and a 3-15mm comb for a Philips clipper.

    User Input Welcomed

    Philips has mentioned that it will take requests from users for parts that aren’t currently available on the site. Still, it’s important to note that these 3D printed components will not serve as replacements for original parts. Given that many customers have voiced concerns over the high price of original parts and the lengthy waiting times for delivery, it’s likely that a significant number of people will choose to 3D print their parts instead.

    Launching in the Czech Republic

    Philips Fixables has first launched in the Czech Republic, due to its collaboration with Pura Research, a company that specializes in 3D printing technology and is located there. The initiative is in its initial testing stage, and Philips has stated that if it proves successful, it will be rolled out to other nations. Moreover, the company is inviting repair professionals and 3D printing fans to contribute to the project.

    Source:
    Link

  • Fix Nvidia Shield Remote Issues with Free 3D Printable Case

    Fix Nvidia Shield Remote Issues with Free 3D Printable Case

    Key Takeaways

    1. The Nvidia Shield remains a solid, if expensive, Android TV option as it approaches its sixth anniversary, thanks to ongoing updates.
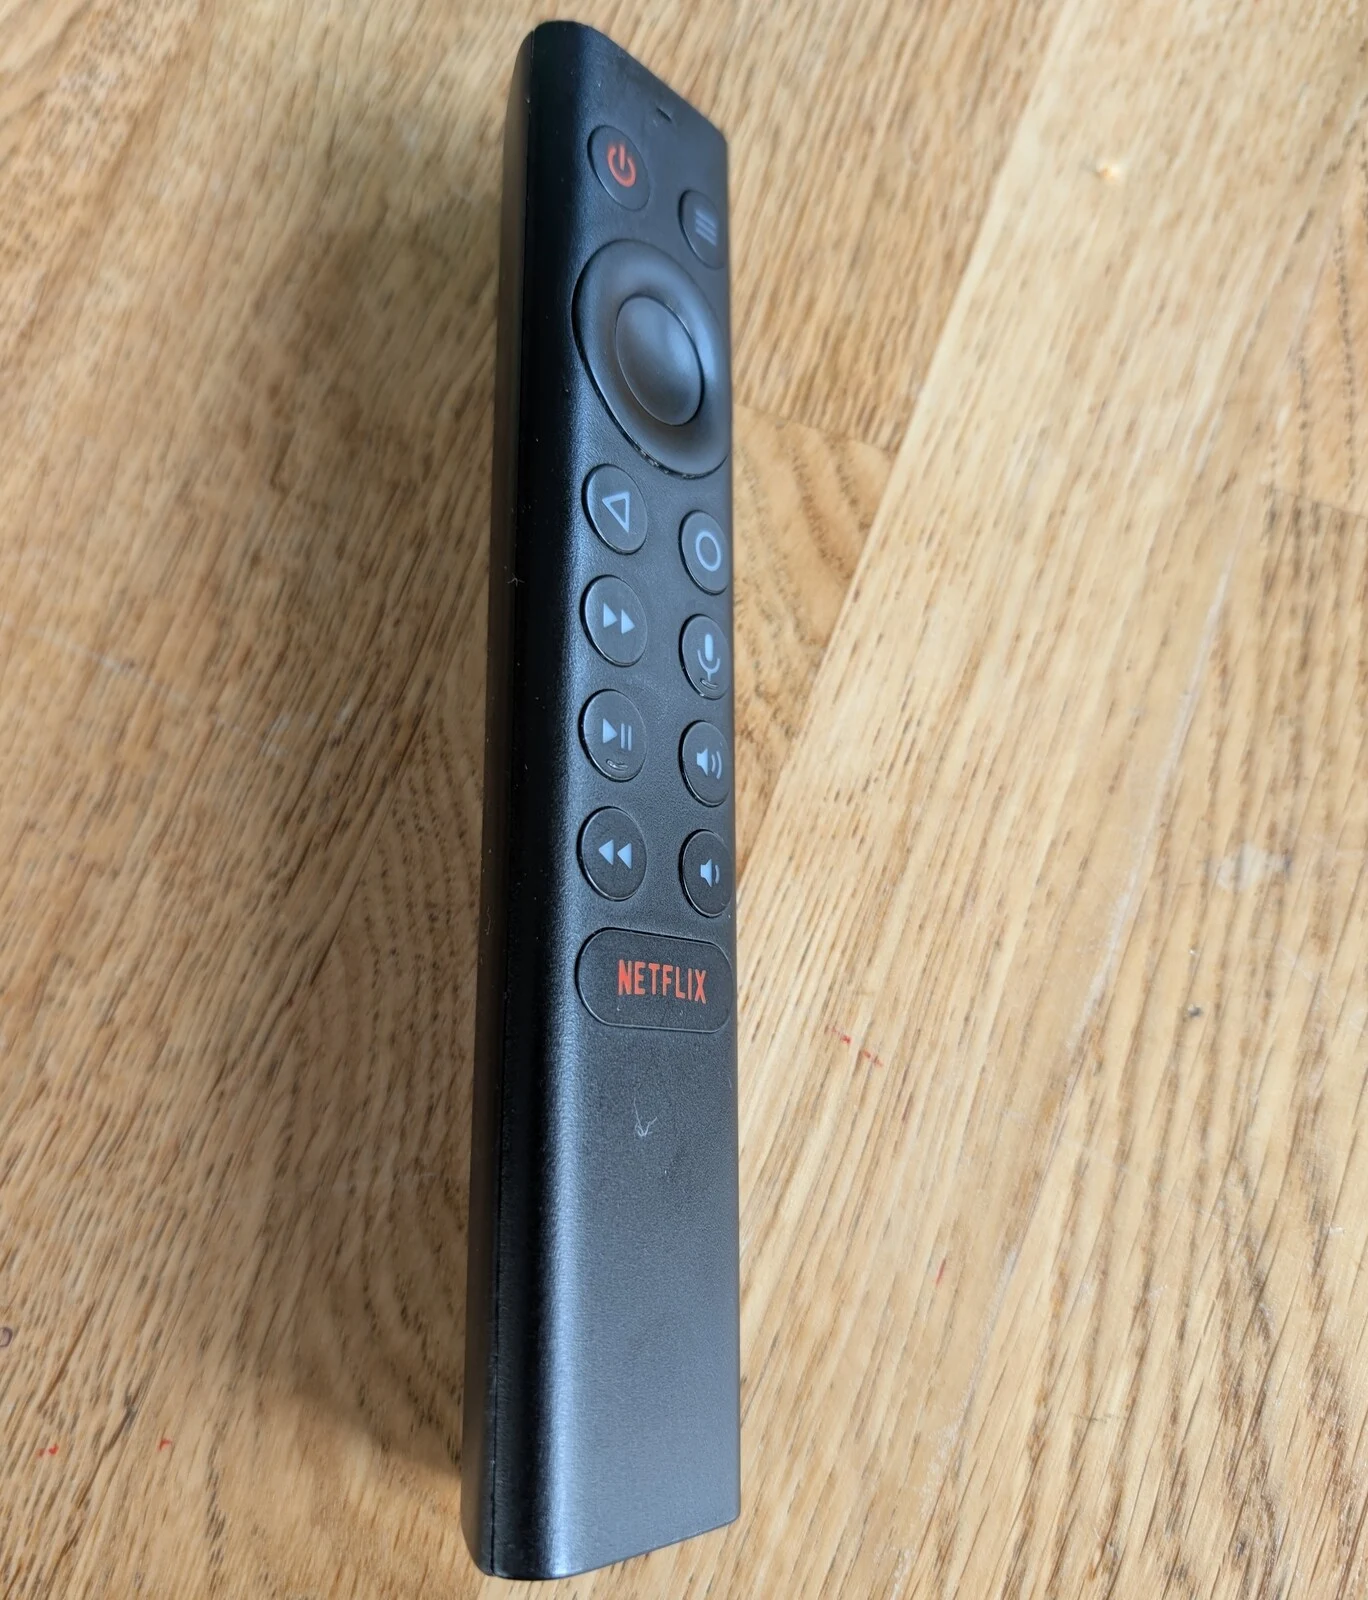
    2. The original Shield remote has frustrating design issues, such as a triangular shape that makes it hard to place flat and an oversized Netflix button that can be easily activated accidentally.
    3. Users can download and print a free case for the Shield remote that improves usability and addresses the annoying Netflix button issue without permanent modifications.
    4. The new case design allows the remote to rest securely on surfaces and makes button pressing easier while preserving the IR blaster functionality.
    5. The case adds weight to the remote, making it more durable and less likely to get lost, showcasing the creativity of the 3D printing community.


    The Nvidia Shield, which can be found on Amazon, is nearing its sixth anniversary. By 2025, it might not hold the title of the top Android TV, but it remains a reasonable, if somewhat pricey, choice. Many of these devices are probably still in use due to the consistent updates they receive.

    Remote Control Issues

    Even when it was first released, the Shield remote had some frustrating features. For instance, pressing the buttons without lifting it can be nearly impossible because of its triangular shape, which prevents it from lying flat. Additionally, the oversized Netflix button is annoyingly easy to activate accidentally while grabbing the remote, which often leads to an abrupt exit from whatever show you were watching to a streaming service you might not even be subscribed to.

    Alternative Solutions

    While it is possible to re-map that pesky button to a more useful function, this trend of having dedicated streaming buttons is similar to adding unnecessary software features that can’t be removed. Luckily, there is a solution for the Shield remote thanks to Karl Toastbrot over on Printables.

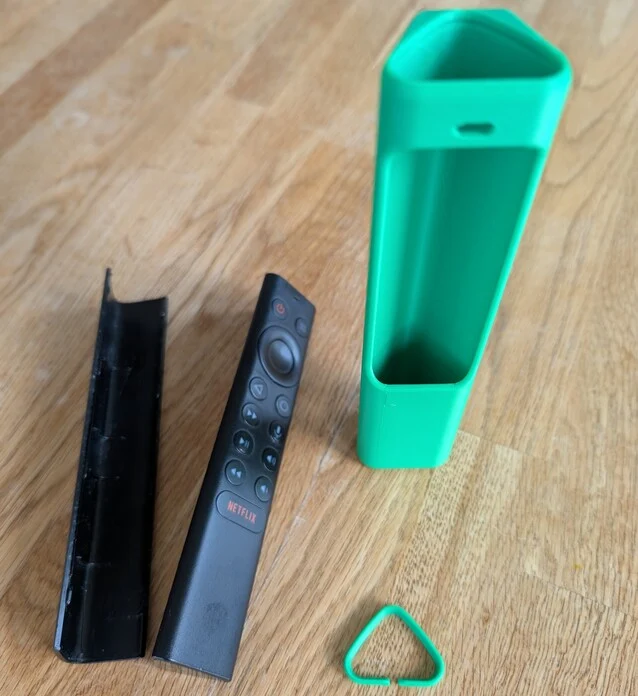
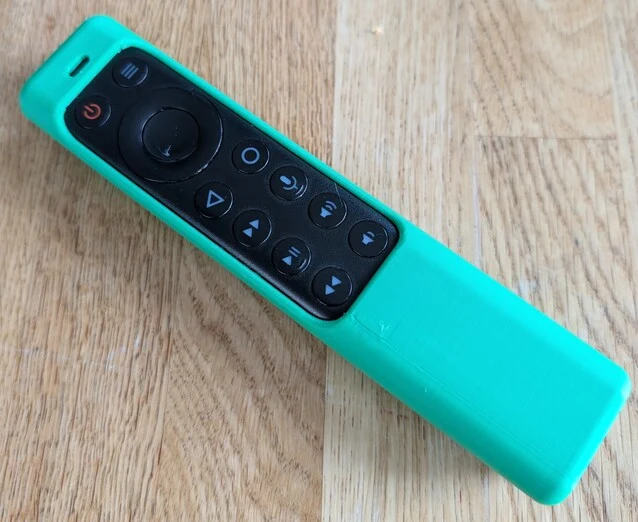
    You can download and print a case for the Shield TV remote at no cost, and it doesn’t need glue or any changes to use. The remote fits securely inside the case, with openings for the main buttons and the microphone, while a notched clip keeps everything snug. There are two versions of the print available: one exposes all buttons, whereas the other hides the Netflix button. Some Shield users have resorted to supergluing the button to disable it, but this simple alternative offers a much better option without making permanent modifications.

    Enhanced Design

    The new case keeps the original remote’s triangular shape, but the back corner has been flattened, allowing the remote to rest on a table without tipping over. This design also makes it easier to press buttons without lifting the device. One of the great features of the Shield remote is its IR blaster, which can control other audio equipment like receivers, and this functionality is preserved with the new case.

    With the added weight, the remote is likely to endure more rough handling from kids or pets, is less prone to disappearing into the couch, and if printed with glow-in-the-dark material, will be easier to find.

    In summary, while the Shield remote fulfills its basic purpose, the new case is a far better option than using gaffer tape to hold the battery door. These minor enhancements highlight the creativity and design talents of the 3D printing community.

    Source:
    Link


  • Affordable Snapmaker A350T: 3D Printing, Laser Cutting, CNC

    Affordable Snapmaker A350T: 3D Printing, Laser Cutting, CNC

    Key Takeaways

    1. Multi-Functionality: The Snapmaker A350T can 3D print, laser cut, engrave, and CNC mill with the right modules.

    2. Quick Swap Kit: This feature allows for easy and fast changes between different toolheads for various tasks.

    3. Pro Combo Package: Includes a dual-extrusion module for using two types of filaments simultaneously, along with a powerful 10-watt laser.

    4. Working Area: The device offers a working area of 320 x 335 x 270 mm (12.6 x 13.2 x 10.6 inches) for all operations, ensuring versatility with various materials.

    5. User-Friendly Design: The 5-inch touchscreen and additional safety features, like an air purifier and enclosure, make it accessible and safe for users.


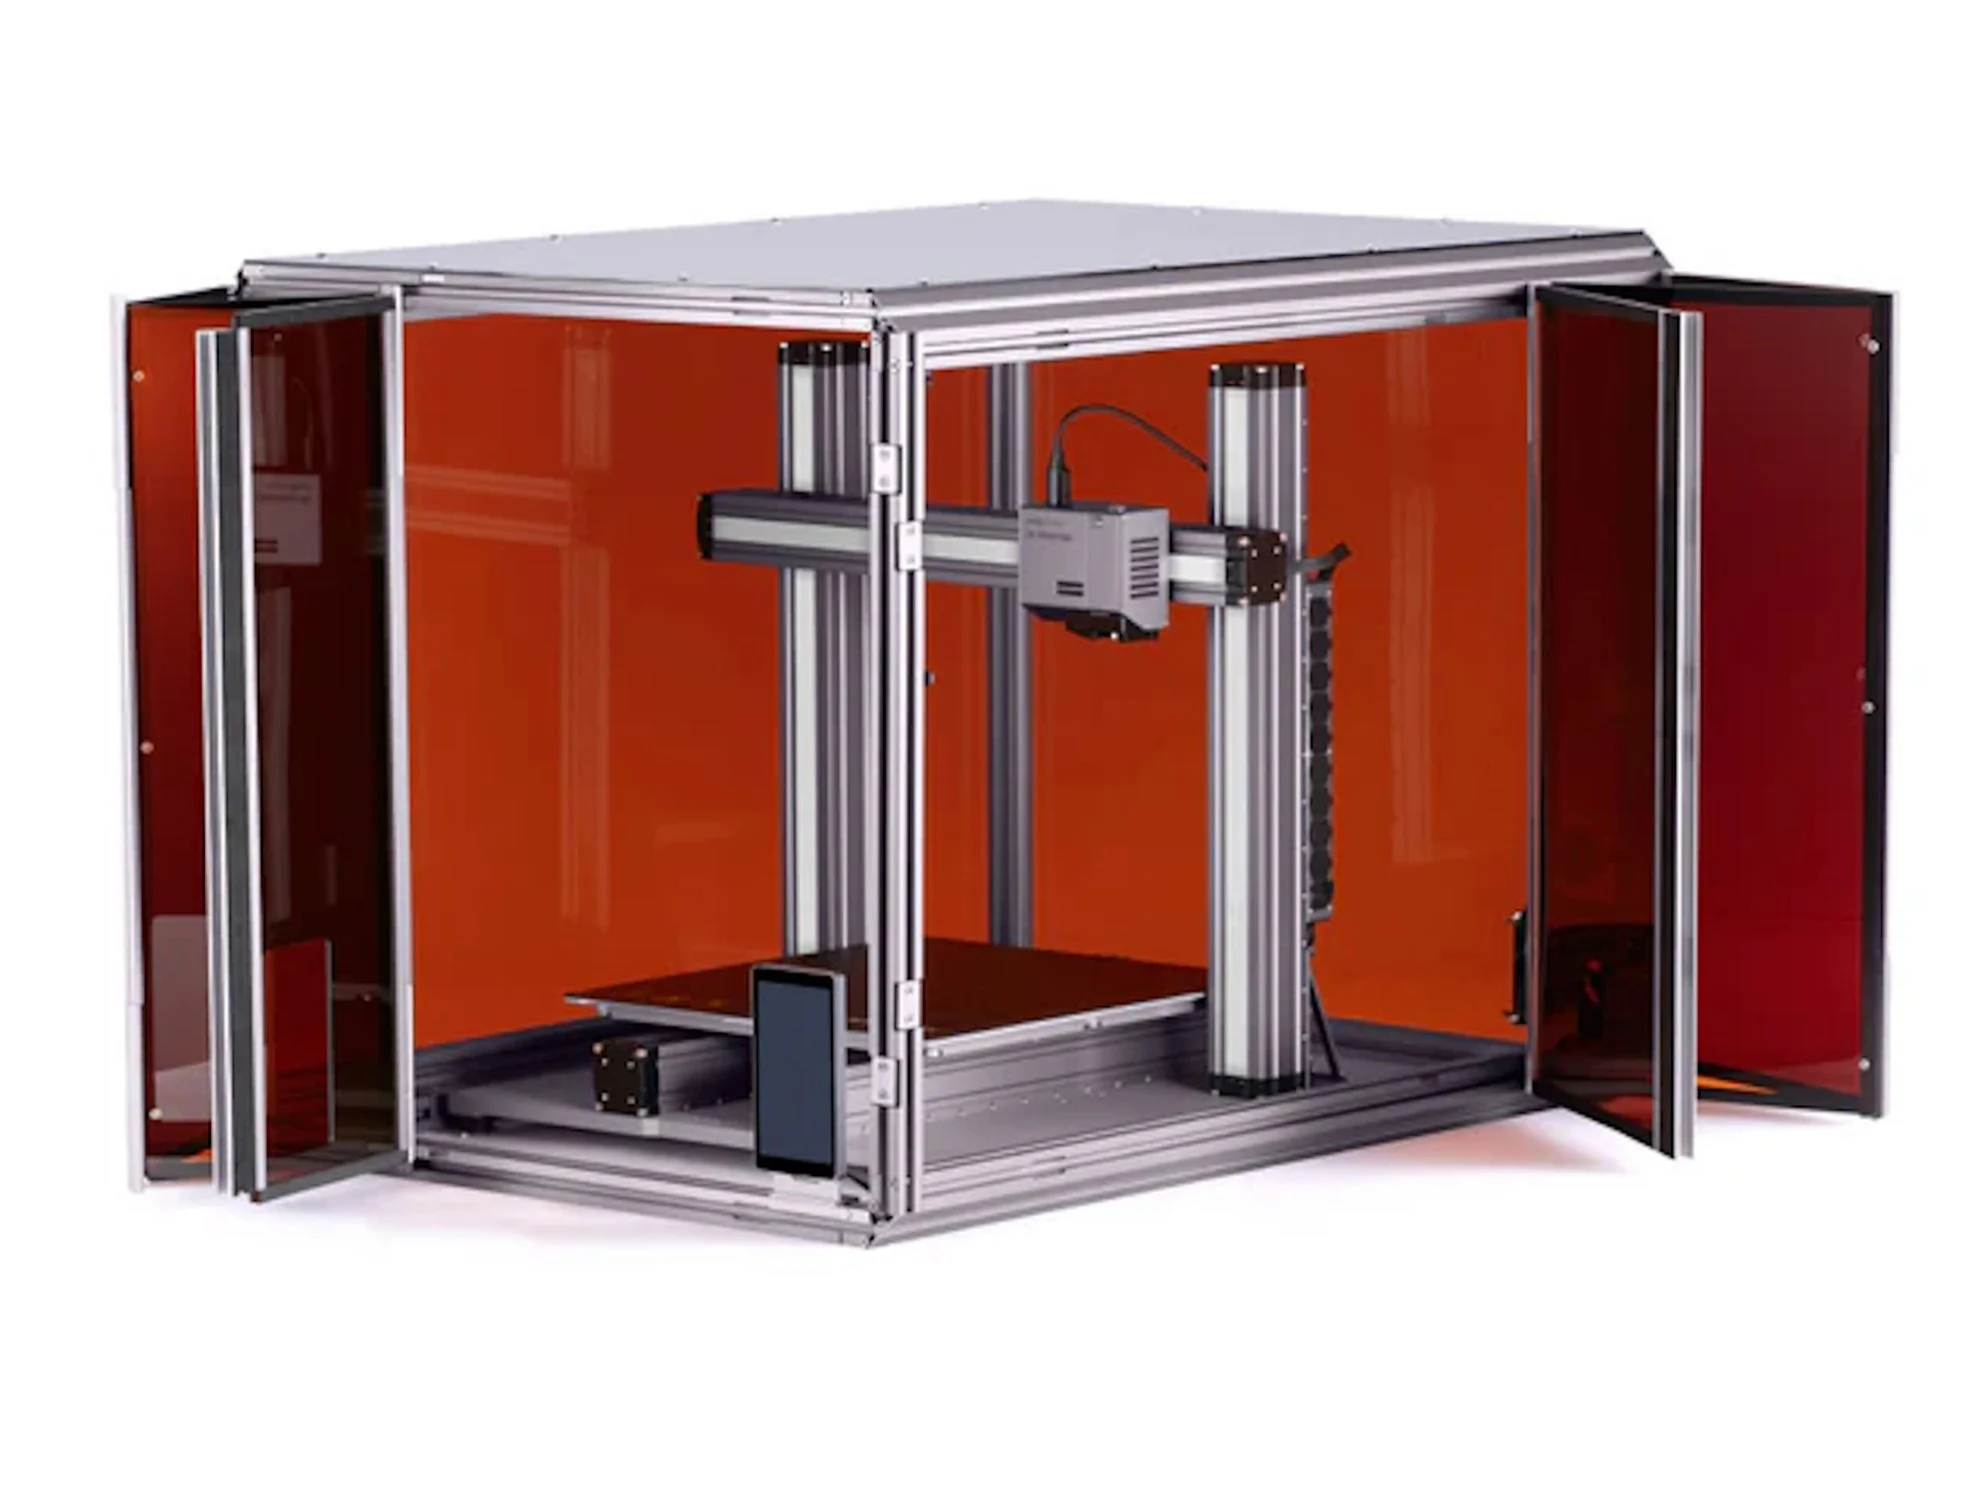
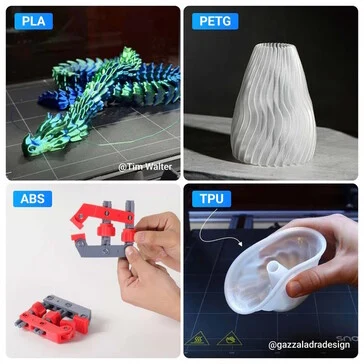
    A broad selection of 3D printers is on the market today, but the Snapmaker A350T (which you can find on Amazon) really distinguishes itself with its extra features. In addition to 3D printing, this device can be outfitted with a laser module for both cutting and engraving, or it can convert into a CNC machine when you add the right module. The Quick Swap kit allows for a quick and easy change between different toolheads. Along with this kit and the regular printing module, the Pro Combo package includes a dual-extrusion printing module that enables users to utilize two types of filaments at the same time. This package also comes with a 10-watt laser in addition to the standard 1.6-watt laser module. The CNC module that comes by default provides 50 watts of power. You can also buy additional upgrades separately, such as a 40-watt laser, a 200-watt CNC module, and an infrared laser module that has a wavelength of 1,064 nm for high-precision engraving.

    Work Area and Capabilities

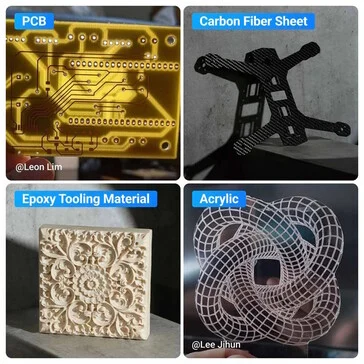
    When the dual-extrusion module is installed, the Snapmaker A350T has a working area of 320 x 335 x 270 mm (which is around 12.6 x 13.2 x 10.6 inches). For tasks like laser engraving, cutting, as well as CNC milling, the official specifications indicate that the working area remains at 320 x 335 mm (12.6 x 13.2 inches). Thanks to its versatile 3-in-1 modular setup, the A350T can work with a wide variety of materials, from wood to metal. It also comes with a 5-inch touchscreen that improves user experience. Additionally, Snapmaker provides an air purifier and an enclosure to ensure safety while laser cutting and performing CNC operations.

    Additional Features

    Snapmaker’s design emphasizes versatility, making it a great choice for hobbyists and professionals alike. The ability to switch between functionalities quickly makes it a valuable tool in any workspace. Its user-friendly interface further enhances its appeal, as anyone can easily navigate its features. Overall, the Snapmaker A350T is not just a 3D printer; it’s a comprehensive solution for various creative projects, blending function and convenience seamlessly.

    Source:
    Link


  • Free 3D Printing Files for AMD RX 9070 XT Shroud by XFX

    Free 3D Printing Files for AMD RX 9070 XT Shroud by XFX

    Key Takeaways

    1. The XFX Quicksilver AMD Radeon RX 9070 XT features a matte-black three-fan shroud for a subtle design.
    2. XFX has released STL files for removable shrouds, allowing for increased customization.
    3. Users are allowed to print and sell 3D-printed parts without legal repercussions from XFX.
    4. Customization files are available for free on XFX’s product page, with options for different shroud designs.
    5. Advanced users can create unique GPU support brackets and cable management add-ons, enhancing personalization.


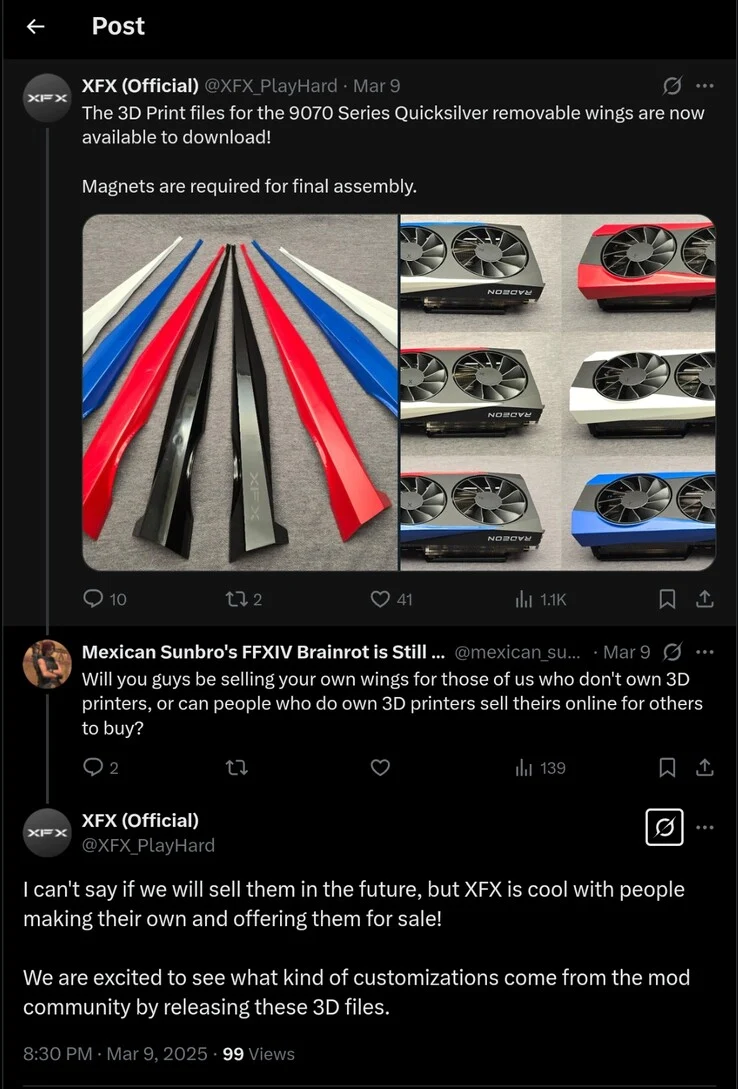
    The XFX Quicksilver AMD Radeon RX 9070 XT Gaming Edition GPU presents a relatively mild take on AMD’s Radeon RX 9070 XT. It features a surprisingly subtle matte-black three-fan shroud. Recently, XFX unveiled STL files (3D models) for the removable shrouds on the Quicksilver cards, which significantly boosts customization options for creative users.

    Legal Assurance for Creators

    When questioned on X, XFX assured that they will not take legal action against anyone who chooses to print and sell these 3D-printable parts. “I can’t say if we will sell them in the future, but XFX is cool with folks making their own and putting them up for sale! We are thrilled to see what kinds of customizations arise from the mod community by making these 3D files available.”

    Easy Access to Customization Files

    These files can be downloaded for free through a link on XFX’s RX 9070 Quicksilver product page. The downloadable package includes various versions of each shroud. XFX also emphasizes that buyers will have to purchase magnets separately to attach the Wings to the GPU shroud. The STL models come with options for the LED side of the GPU, both with and without the XFX logo. Both the LED-side and PCIe-side shrouds are available in single and split pieces. This split design is a smart move for customization, as it allows users to print the parts in different colors or materials. Plus, it helps those with smaller 3D printers to manage printing without hassle over where to divide the component.

    Opportunities for Advanced Users

    For gamers who have some experience in 3D modeling and CAD, these 3D-printable Wings offer exciting avenues for customization. Think about creating unique GPU support brackets or cable management add-ons, for instance. This allows for a deeper level of personalization, making the GPU not just a piece of hardware, but a canvas for creativity.

    Source:
    Link


  • Custom Steam Deck Case Transforms Handheld into Mobile Workstation

    Custom Steam Deck Case Transforms Handheld into Mobile Workstation

    Most handheld devices aren’t designed for productivity. The Legion Go, which features detachable controllers, could potentially serve as a makeshift workstation, but that’s the charm of PCs. Users often discover applications that the creators never envisioned.

    Productivity Limitations of the Steam Deck

    The Steam Deck isn’t the best choice for heavy work tasks. If you find yourself bringing along a separate keyboard and mouse, you might as well just take a laptop instead. There’s no kickstand, and trying to manage a 10,000-line spreadsheet isn’t exactly enjoyable, especially on the Deck’s modest 800p display. However, the community hasn’t let that stop them. The Deck can definitely handle a few emails and offers much more once you dive into the extensive library of Free and Open Source Software (FOSS) that’s accessible on Linux.

    A Handy 3D-Printed Solution

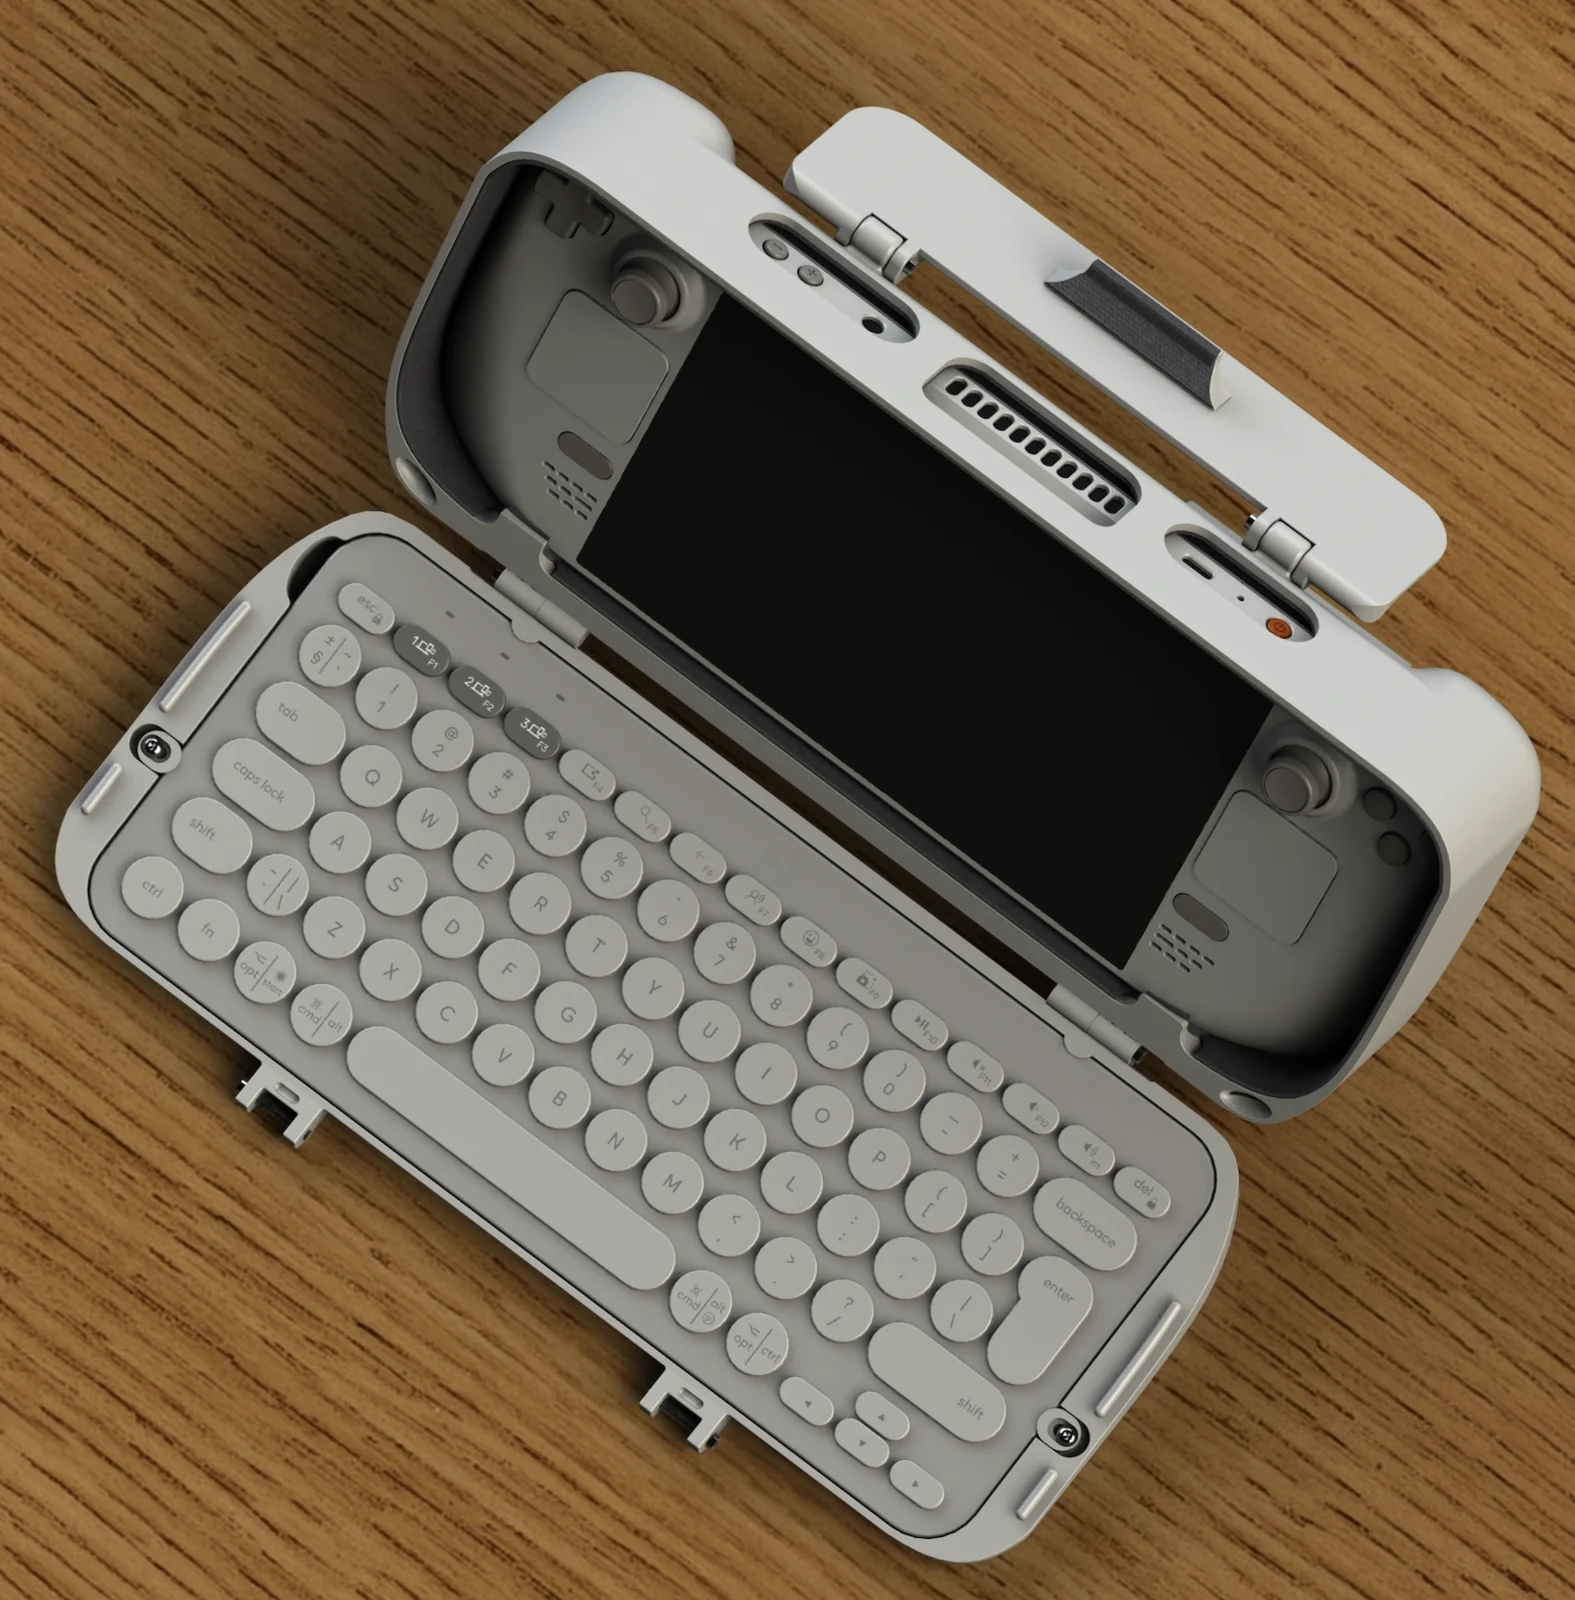
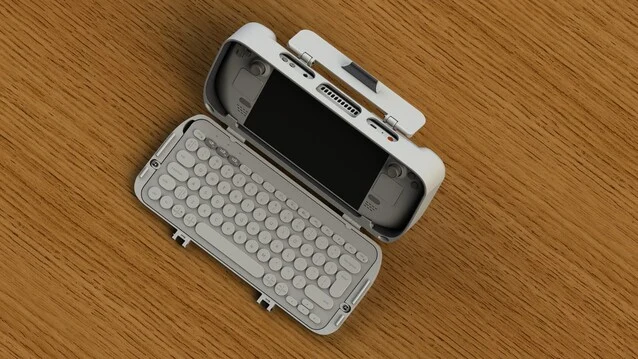
    If you’re not keen on lugging around multiple gadgets, you can use Natter_LT to 3D print your own Steam Deck “Play&Work” case for just $9.25.

    This case has some strong Steam Punk aesthetics, which only adds to its appeal. It includes several clever features, like the ability to easily insert a standard Logitech Pebble Keys 2 K380s (you can find this on Amazon) and detach it. It also has cutouts for all necessary ports and buttons, a handle for transport, and a built-in kickstand that opens up for air circulation around the Steam Deck’s vents. When it’s closed, the entire product is quite similar in size to the case that Valve provides.

    Great Value for 3D Printing Enthusiasts

    If you have access to a 3D printer with a minimum bed size of 300mm squared, spending $9.25 on the CAD files seems like an excellent deal for crafting the ultimate portable gaming and mobile office solution. If only we could create something similar for those who don’t own a Steam Deck.

    Source:
    Link


    Image 1
  • PETFusion 2.0: Convert Plastic Bottles to 3D Printing Filament

    PETFusion 2.0: Convert Plastic Bottles to 3D Printing Filament

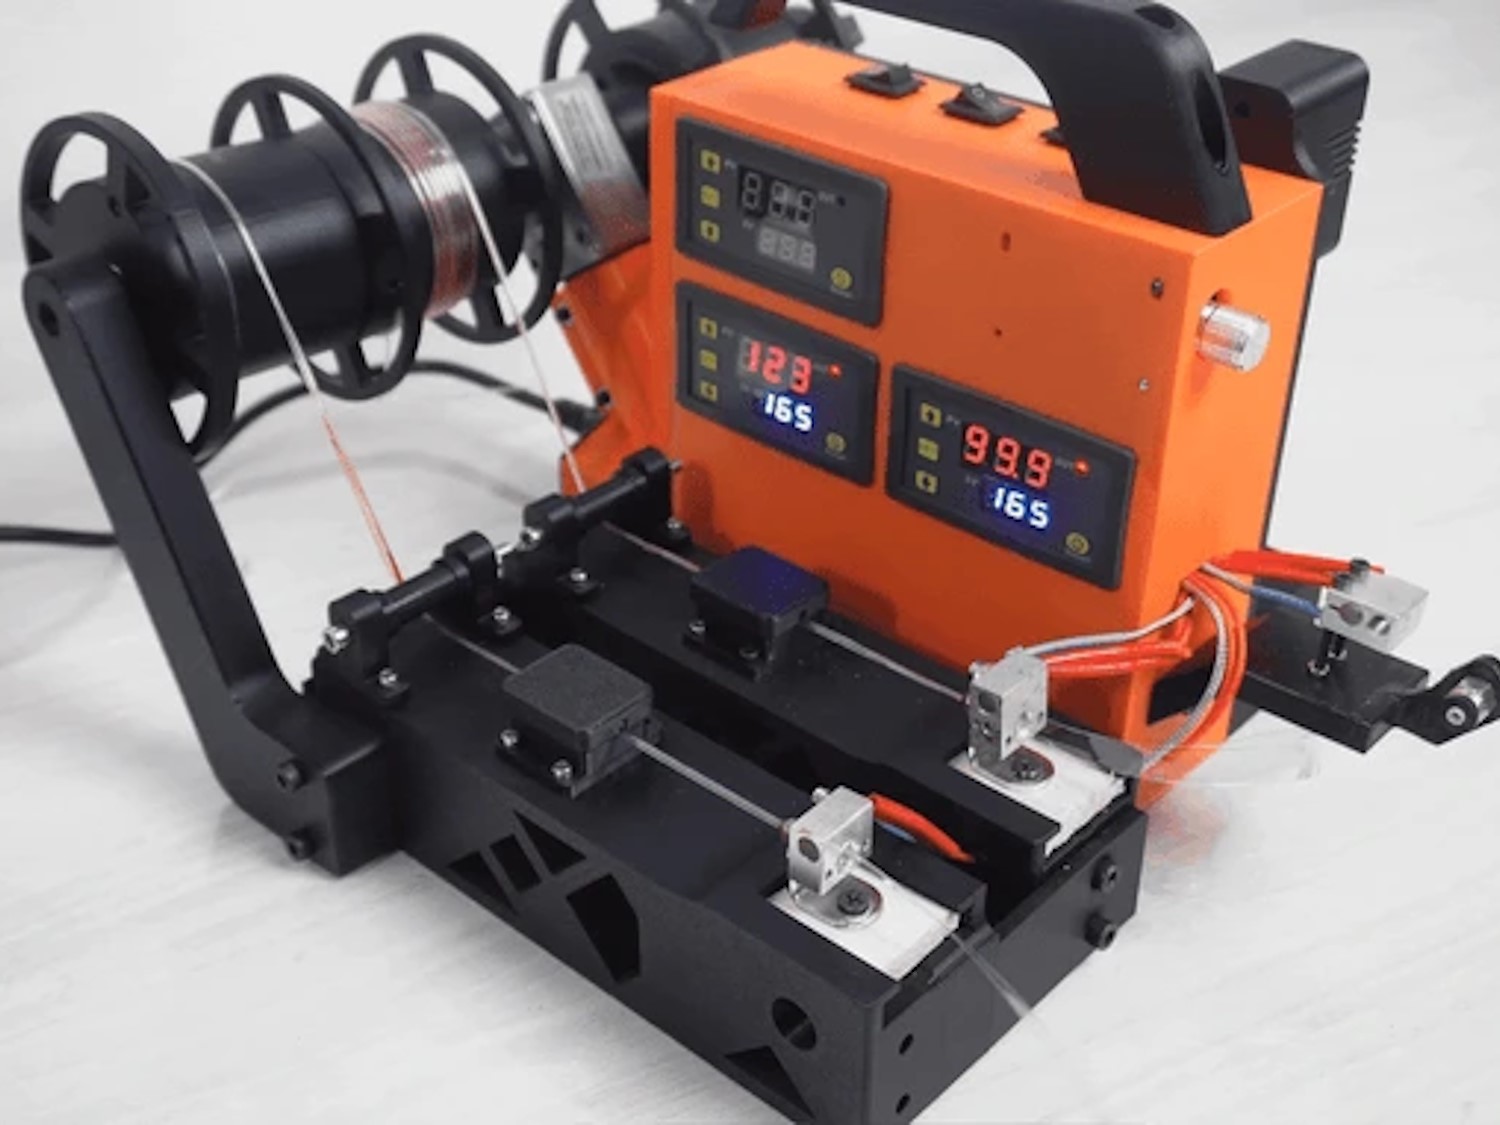
    If you take a closer look at plastic bottles and the filament used in 3D printing, it might not be obvious at first glance, but both utilize PET as their main material. The PETFusion 2.0, a device aimed at recycling PET bottles, is currently seeking funding on Kickstarter. A unique feature of this crowdfunding initiative is that backers will not receive the physical PETFusion 2.0 machine, but instead, they will get access to the STL files needed to create the machine themselves, assuming they already have a 3D printer.

    Support Options and Benefits

    Depending on how much supporters contribute, they will receive not just the print files, but also a list of parts that can’t be printed with a 3D printer, detailed instructions, and personalized assistance. There’s even an option for a commercial license, which allows backers to produce and sell the PETFusion 2.0 commercially. For a donation of $39, users gain access to the instructions. Given that version 2.0 of the PETFusion is already available, as shown in the shared videos, the financial risk for backers appears to be fairly minimal.

    Filament Creation Process

    To create filament from a plastic bottle, it’s crucial that the PET bottle is clean and devoid of any labels. The bottle is sliced into strips, which are then heated and printed through a hotend with a 1.75 millimeter diameter. As the filament is being made, it goes through an ink-based colorizer that adds color to the filament, as the name indicates. A filament welder is also included, allowing users to connect shorter lengths of filament together easily, which is great for larger 3D printing tasks. Overall, the PETFusion 2.0 aims to be a comprehensive machine that integrates cutting, extrusion, spooling, and welding functionalities.

    Closing Thoughts

    In conclusion, the PETFusion 2.0 is an innovative solution for recycling PET bottles into usable filament for 3D printing. With its unique crowdfunding model and range of support options, it provides an exciting opportunity for 3D printing enthusiasts. The combination of easy-to-follow instructions and the ability to produce filament from recycled materials makes it a standout project on Kickstarter.

    Source: Link

  • YouTuber 3D-Prints Rideable Star Wars AT-AT Model

    YouTuber 3D-Prints Rideable Star Wars AT-AT Model

    2 meters tall, with a speed of about 0.06 km/h, and strong enough to support a human, the AT-AT replica created by James Bruton is a dream come true for Star Wars enthusiasts. The core of this project is a 3D printer, which Bruton utilized to manufacture most of the components himself. Alongside the printed pieces, the design incorporates aluminum profiles, engines, and electronic parts.

    Design Modifications

    Bruton’s version of the AT-AT does not perfectly match the original design. The robot’s knees are positioned outward, which is a departure from the film’s design but provides essential stability. The legs are powered by electric motors, which are connected via an Ethernet cable and can be controlled remotely.

    Precision Control

    To accurately track the position of the legs, Bruton has included a potentiometer in each leg. This device measures resistance and sends vital information back to the central control system about the leg’s position. This feature allows the AT-AT to maintain a specific movement pattern without losing balance.

    Project Origins

    The journey began with a small, remote-controlled AT-AT, which served as the foundation for this larger endeavor. The first YouTube video showcases the template and documents the assembly process leading up to the completion of the legs.

    In the follow-up video, Bruton, dressed as a stormtrooper, demonstrates and tests the 3D-printed AT-AT in a parking lot. If the AT-ATs from "The Empire Strikes Back" had displayed this kind of speed, the outcome for the Galactic Empire would have been quite different. Nevertheless, the robot successfully carried Bruton, marking the experiment as a triumph.

    For those interested in creating their own AT-AT, Bruton has made the CAD and code files available on GitHub for both the smaller and larger versions.